10 Best Unfinished Wood Veneer Sheets for Your Projects?
When it comes to crafting and DIY projects, choosing the right materials is crucial. Unfinished Wood Veneer Sheets offer versatility and a natural aesthetic that can elevate your work. With various grains and textures, these sheets can help you create stunning designs. This guide explores the ten best options available, emphasizing their unique features and usability.
Crafting with Unfinished Wood Veneer Sheets brings out creativity. Each piece has its own characteristics, allowing endless possibilities. Whether you are a seasoned woodworker or a beginner, these sheets cater to all skill levels. You can achieve a polished look with careful application and finishing.
However, selecting the perfect veneer can be overwhelming. Some may lack the quality needed for intricate projects. As you browse, consider factors such as thickness, grain pattern, and finish options. Knowing what to look for will help you make informed decisions. Let’s dive into the best options available, ensuring your next project stands out.
Types of Unfinished Wood Veneer Sheets Available in the Market
When exploring the types of unfinished wood veneer sheets available, several options stand out. Wood veneers are typically categorized based on species, thickness, and texture. Popular wood species include oak, walnut, cherry, and birch. Each species offers distinct grain patterns and colors, allowing for artistic flexibility in projects. According to industry reports, oak veneers dominate the market, comprising about 35% due to their strength and aesthetic appeal.
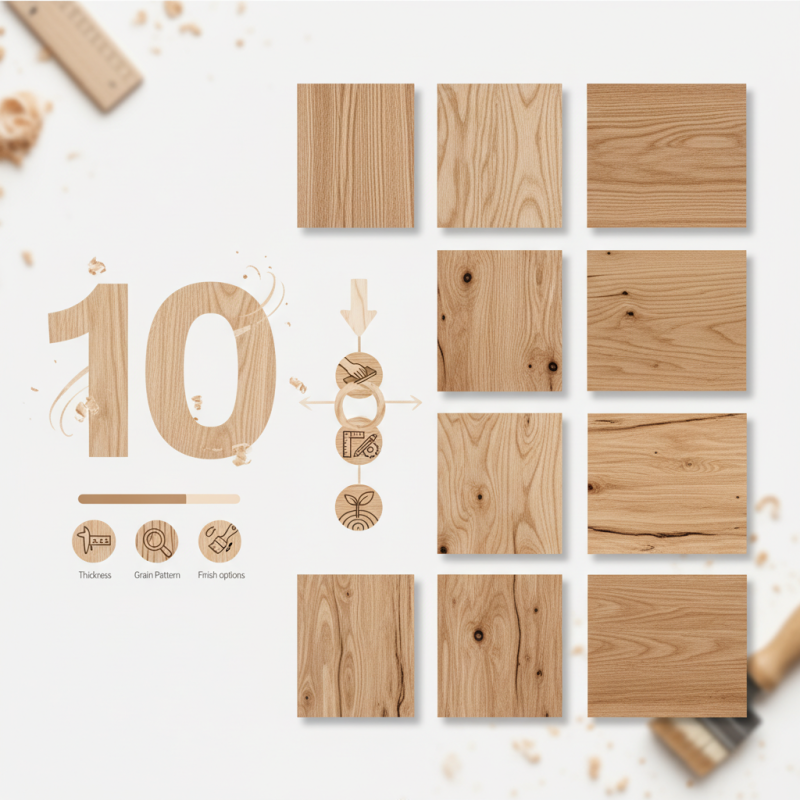
The thickness of veneers also varies. Common thicknesses include 0.5mm to 3mm, catering to different uses. Thinner sheets are ideal for intricate designs or curved surfaces, while thicker sheets provide sturdiness for furniture applications. Moreover, unfinished veneers allow for customization. Users can apply stains or finishes, enhancing the wood's natural beauty. Industry professionals emphasize the importance of selecting the right thickness for your project needs.
Despite their appeal, there are challenges. Unfinished wood may warp or crack if not handled properly. Humidity changes can affect the veneer’s integrity. The application process requires skill, as improper techniques can lead to visible seams or peeling edges. It’s crucial to understand these nuances before embarking on a project. Knowing the types and their characteristics can guide better choices in veneer selection and application.
Factors to Consider When Choosing Wood Veneer Sheets for Projects
Choosing the right wood veneer sheets for your projects is crucial. Start by considering the species of wood. Different woods offer various colors and grain patterns. Oak, birch, and maple each bring a unique character to a project. Think about how these colors will blend with your design. The thickness of the veneer is also important. Thicker sheets offer more durability but can be harder to work with.
Next, evaluate the veneer’s backing. Wood veneer sheets can come with a paper or fabric backing. This choice impacts adhesion and flexibility. Paper backing is easy to apply but may not be as strong. A fabric backing, however, provides more stability during your project. Consider how you will use the veneer. Does it need to bend around curves? Or will it lay flat on a surface?
Don’t overlook the surface finish of the veneer. Some sheets come pre-finished, while others require sanding and sealing. Pre-finished veneers save time but limit customization options. Conversely, unfinished sheets allow for more creativity but involve extra work. It is essential to reflect on your skills and resources. You might face challenges along the way, but the joy of creating a handcrafted item makes it worthwhile.
10 Best Unfinished Wood Veneer Sheets for Your Projects
| Type of Wood | Thickness (inches) | Sheet Size (inches) | Finish Type | Ideal Projects | Price Range |
| Birch | 0.025 | 24 x 48 | Raw | Cabinets, Furniture | $20 - $30 |
| Maple | 0.020 | 24 x 48 | Unfinished | Tables, Shelves | $25 - $35 |
| Oak | 0.030 | 30 x 60 | Natural | Cabinets, Flooring | $40 - $50 |
| Cherry | 0.026 | 48 x 96 | Smooth | High-end Furniture | $50 - $70 |
| Walnut | 0.025 | 24 x 48 | Matte | Decorative Projects | $40 - $60 |
| Pine | 0.015 | 24 x 48 | Hybrid | Crafts, Picture Frames | $15 - $25 |
| Teak | 0.030 | 48 x 96 | Natural | Outdoor Furniture | $60 - $80 |
| Mahogany | 0.020 | 24 x 48 | Polished | Luxury Designs | $55 - $75 |
| Bamboo | 0.022 | 48 x 96 | Eco-Friendly | Sustainable Projects | $30 - $50 |
| Hickory | 0.020 | 24 x 24 | Natural | Heavy-Duty Projects | $35 - $45 |
Top 10 Unfinished Wood Veneer Sheets for Various Applications
When seeking unfinished wood veneer sheets, options abound for various applications. These sheets are essential in carpentry, crafting, and furniture design. According to the Wood Products Manufacturers Association, wood veneer not only enhances aesthetics but also improves structural integrity. Unfinished options allow for personalization, ensuring every project reflects the desired style.
Market research highlights that the demand for custom wood veneers has seen a significant rise. A recent study showed that nearly 70% of designers prefer materials they can modify. This statistic underscores the versatility of unfinished wood veneer sheets. Artisans often choose these sheets for their unique patterns, which can blend with any decor.
However, working with wood veneers comes with challenges. They require precise cutting and professional finishing to achieve flawless results. Misalignment during application can lead to uneven surfaces, which few anticipate. This aspect emphasizes the importance of skill and patience. Understanding the properties of different woods can inform better decisions for specific projects. Craftsmanship in using these materials can transform an ordinary piece into an extraordinary masterpiece.
Tips for Working with Unfinished Wood Veneer Sheets in Your Projects
Working with unfinished wood veneer sheets can be a rewarding experience. However, it requires a keen eye for detail and careful handling. Start by assessing the quality of the veneer. Look for consistent grain patterns and avoid sheets that display significant imperfections. Remember, some flaws can add character, but excessive damage might hinder your project.
Preparation is critical when using wood veneer. Ensure your working surface is clean and well-lit. Use a sharp utility knife for trimming edges. Some may find it challenging to achieve clean cuts. Practice on scrap pieces before tackling your main project. Also, consider using glue designed specifically for veneers. It can help adhere the sheet smoothly without creating bubbles.
Once applied, sealing the veneer is vital for durability. Choose a suitable finish like oil or polyurethane. These can enhance the grain while offering protection. Be aware that the finish may alter the veneer’s appearance slightly, sometimes in unexpected ways. Regular maintenance will be necessary to keep the veneer looking its best over time. Remember, patience is critical, as mistakes can happen during any stage of your project.
Maintenance and Care for Wood Veneer Sheets after Installation
Wood veneer sheets bring beauty and elegance to various projects. However, they require proper maintenance and care after installation. Regular cleaning is essential to keep the veneer looking its best. A soft, dry cloth can remove dust. For deeper cleaning, use a damp cloth with mild soap. Avoid abrasive cleaners, as they can damage the finish.
Humidity levels play a crucial role in the care of wood veneer. Too much moisture can lead to warping or bubbling. Conversely, excessive dryness may cause cracking. It's important to keep your home environment stable. A humidifier or dehumidifier can help manage these levels effectively.
Applying a protective finish is another helpful step. This layer can enhance the veneer’s lifespan and maintain its appearance. Reapply as needed, especially in high-traffic areas. Even with the best care, imperfections may arise over time. Dents and discoloration can occur, requiring careful touch-ups. Regularly inspect your veneer to address small issues before they worsen.
Comparison of Different Types of Unfinished Wood Veneer Sheets